Showing posts with label crafts. Show all posts

Wednesday, November 20, 2013

What Inspires You Wednesday

Handmade Holidays


I'm always inspired to make something handmade for the holidays. Whether it is something to decorate with, give as a gift, or eat remains to be seen. Truth be told, it's usually all three.

I know we haven't even celebrated Thanksgiving yet, but the hustle and bustle will soon be upon us and there is no time like the present to mull over some Christmas crafting ideas.

On that note, here's volume 1 of crafting the holidays which features DIY holiday projects that inspire me to get my craft on. I'd be happy to make any of these to display in my home or give as gifts this season.


1. advent calendar via petitpoulou
2. rosemary wreath via the pretty blog photos by susand brand
3. doily gift card envelope via homelife photo by amanda mclaughlan
4. cyprus in a mug via designsponge
5. glitter pinecones via miss mustard seed
6. wood garland via the house that lars built
To me, these Christmas crafts speak to the simplicity that the holidays should embody. You won't find me standing in line waiting for some store to open to get the best deal of the year. I'd much rather be at home, sitting by the woodstove with a cup of hot chocolate making something special for the people I love.

It's a brisk day here today, but the sun is shining. I can see a short walk with the dog in my future. I think I'll take along a bag and see what I can find for this year's holiday crafts.

Ciao for now,


Wednesday, December 12, 2012

A Paper Star for Christmas: How To


Star Shine

Hey ya'll....(you know how I like to whip the ya'll out once in awhile even though I'm not from the South).  Happy Wednesday. 

We had a nice night over at my parents celebrating Garrett's birthday. It was low key, there was big honkin' shrimp involved and of course the obligatory photos by Mom The Photographer. 

Today we're back into holiday mode around here. I'm in the midst of reposting some of the tutorials that I've featured and Kristen, over on Milo and Molly is doing the same. So pop on over there, check out her digs and tell her I sent you.

This is one of my favorite tutorials and I'm still making new paper stars with paper I've designed myself.


They're always a big hit. In fact I have some Christmas orders for several that I need to get crackin' on. 

So, without further ado, here's my original post from over a year ago with the paper star tutorial.

*****************************************************

I have to thank Cari-Jane from HyrbridHandmade for pinning an awesome paper star tutorial on pinterest. I love it and it looked so do-able, I tried it right away.  Here's my own take on the tutorial that Cari-Jane pinned. 

You'll need:

two pieces of square paper- you could use origami paper
(I used a 32 lb. printer paper)
scissors
glue
ruler
string, ribbon or twine

I printed off one of my illustration designs to use for my paper.


Then I trimmed it to 6 x 6 like the original tutorial, but you could use any square size.


Fold your paper in half.


Then fold in half the other way, so you now have folds on your paper like this.


Next step is to fold corner to corner.


Again, now fold from other corner to corner so you fold lines now look like this.


On lines coming from sides (not corners), make a just shy of halfway. On my 6 x 6 square, I marked at 1.25. 


Continue until each side is marked, like this.


Cut along line to each mark.


Once lines are cut, fold over to line coming from corner. 


Do this all the way around until your paper looks like this.


Now glue one flap at each 'star' point, and pull other flap over and hold until glue is set.


Choose one point to insert twine in before completing all sides.


Complete rest of points.


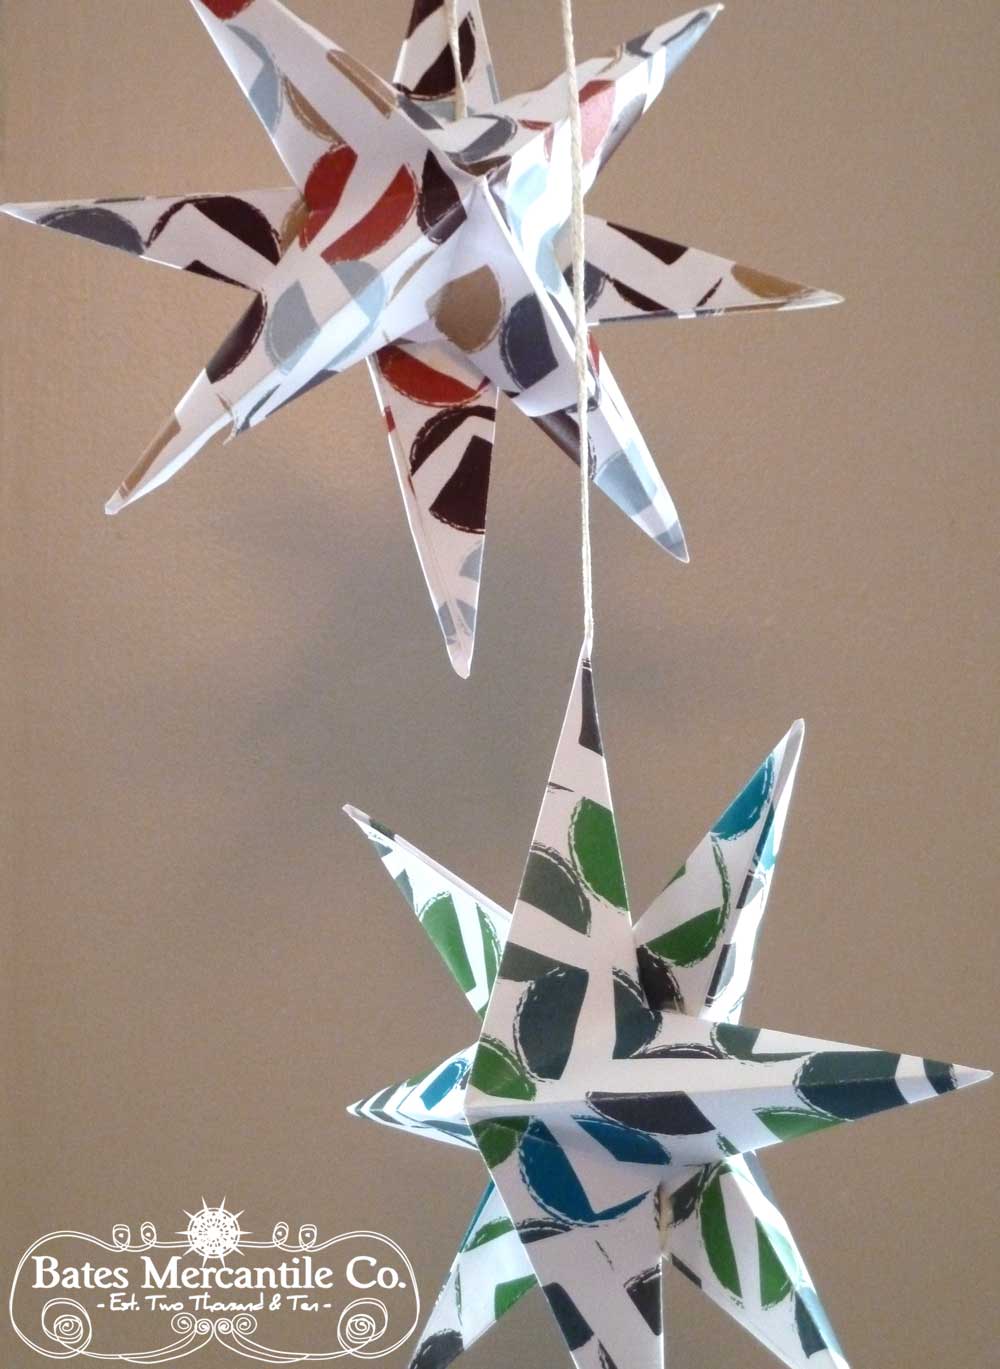
You now should have a 3 dimesional star that looks like this on one side.........


........and this on the other.


Repeat this process, except for the twine, to make another star. Once you have two stars you are going to glue together. Place glue like this.


Gently press two stars together and hold in place until glue sets.


Wait 10 minutes before hanging to be sure glue is set enough.


Decorate with your new star as you see fit. 

Hang a lone star or...................


.......hang in a grouping. 


I think this is the perfect craft with the holidays coming up. I've adjusted my Chinese Lantern pattern an 8x8 size so most people can easily print it out on 8.5 x 11 paper to use for this project.  I would have tried the 8x8, but was trying to follow original tutorial.  I did use a little bit heaver 32 lb. paper, but you could certainly try it with regular copy pape. I think by the time the stars are folded and glued, it would have enough stability. 

Click below and right click to save to your computer or copy and paste into a document.


I would have tried the 8x8 paper design, but was doing my best to follow original tutorial to a T.  FYI- I did use a little bit heavier 32 lb. printer paper, but you could certainly try it with regular printer paper. I think by the time the stars are folded and glued, it would have enough stability.

What are you waiting for? Give it a try!

Ciao for now,


PS- Have you entered the December Giveaway yet? Just so you know, you could win over $215 worth of prizes from my awesome sponsors. As usual though.... you have to enter! So, go enter!


Monday, October 15, 2012

Take A Walk With Us & Weekend Crafts


Let's Begin The Week With A Quick Break

It's been pretty rainy here this Fall (Can't really complain though because our Summer was as good as it gets). The sun came out on Saturday, and I knew I had to set some time aside at the end of the day for a jaunt over to the field. Sometimes you've got to get, while the gettin' is good.  You might have guessed, this made the dog incredible happy. As soon as I went for his leash he was turning in circles with excitement. No matter how many times we take a walk, at 13 years old, this is still Lucan's ritual. I get the leash, he turns in circles because his excitement is simply uncontainable.

Luckily the field wasn't too wet from all the rain, so the two of us made the complete round.

I need to get back over there today before more showers get here. I'll be armed with the clippers though, so I can nab some of that bittersweet. So pretty.


Get a load of that hive. It's BIG. We must have walked right by it a gazillion times and never noticed it for all the leaves. Now that many have fallen, I could see it from a good bit away. I wasn't sure what it was a first. I thought maybe it was a big bird like an owl, but as we got closer I could see it was an awesome hive. I'd love to nab that too. It didn't look active. Might need Gar to help me get that one though, it's a little high for me.

Beyond the walk, other things I did this weekend included:

-visiting with neighbors
-Friday night youtubing singing and dancing (I know, you're shocked, right?)
-made a biggo pot of meatballs on Saturday so they could cook all day- so good!
-cleaning house & laundry
-illustrating my 2013 desk calendar design. Getting there, but a little ways to go until it's complete. Gotta get a move on because I want to offer them at the craft fair next weekend.
-a little chalkboard painting (more below)

All in all, it was (well, other than the fact that our Yanks lost their first two games to Detroit and Jeter Duck broke his ankle- ugh. If you are wondering why I refer to Jeter as Jeter Duck, there is a picture in the middle of this post that will explain everything ), a pretty enjoyable weekend.

Say What You Mean

As we prepare for the craft show we're participating in next weekend, in addition to my illustrations and paper goods, and Gar's concrete home and garden decor, I wanted to include some other crafts. Yesterday I worked on the sweetest little project. Mini chalkboard trays.

I started out taping off, the area in the center I wanted to paint.


I soon decided though, that it was best to free hand it and opted for a smaller brush as well.

These are easy as pie. Just a matter of drying time between coats, that made this a practice in patience.


Once they were dry, I put the next coat on and really love the way they came out.


If you happen to live near by, we'd love to see you at the fair next Saturday.  Here's the poster I designed for the library. Stop by for a visit!

Here's to a new week. Make it a great one. Hey, if you follow us on Facebook, stop by for Meet Up Monday and share your links (i.e. facebook, etsy shop, pinterest, twitter, etc.). 

ttfn,


Thursday, October 11, 2012

What I've Been Working On


In the Office/Studio

Things have been busy around here. You can relate, right?  By day, I've designing brochures, and ads, and such for my Speakeasy clients. By night, I've been prepping stock for the craft fair Garrett and I are participating in next weekend.


1. I'm always working on new illustrations and right now I'm in the 'tweaking' stage of my latest, Ahoy Matey.  This will go in our etsy shop, and I'll also offer it at the fair, as an archival print. When I decide I'm done tweaking. 


2.  Add to that printing and cutting stationery. I got a good few packages put together last night. I'm including my old standbys like the Louis Louis pop art pink chair.

3. I'm also including new designs, like Under Foot which was inspired by woven rugs. This too will be available soon in our shop. It's just a matter of squeezing in time to list it. 


4. I've been making custom paper stars using my own paper designs. I'll let you in on a little secret....these stars are not something you can just whip out quickly. It's a process of printing, folding, gluing, attaching hanger, and drying.  I love how they turn out, so it's all worth it. [If you want to try some of your own, you'll find my tutorial here.]


5. Painted clipboards have been on the list too [like I showed you in this recent tutorial]. They're just fun. I worked on these on Sunday, which seems to be a good day for that sort of thing. You can just sit and watch the game, and paint away.


I know that some of you with etsy shops, are doing the fall/holiday craft fair circuit. What have you been busy making? I wonder if the rest of have plans to attending any fairs in the coming weeks?

That's it for the desk/cocktail table/kitchen table dispatch today (yes, I take over whatever space I need to work on these projects!).

In Case You Missed It

Yesterday marked the launch of the Mercantile Muse October Giveaway. It's in full swing and I don't think you'll want to miss a chance to win all of the wonderful handmade items up for grabs. $175 worth of handmade items, in case you were wondering.

In other news, the sun is shining! It's been pretty sparse here lately. The week has been soggy, to say the least. In fact, it's been so soggy, we had our first fire of the season last night, just to take the edge of the damp. The sun is a very welcome sight.

Enjoy your day.

See you on the flip side,


Tuesday, September 4, 2012

Pinning for Do-able Design

Pinned Image

It Doesn't Have To Be Complicated

The thing with design is that quite often, people over think it.

I believe that the design that makes your house a home should be easy. It should reflect your personality, should be easy to do and should feel easy, like a comfortable chair. Even if you have a more classical and less about cozy comfort, it doesn't mean things have to hard to execute.

I mean, why complicate things? 

Today I'm sharing some things that I've pinned on Pinterest because I love their simplicity. I love the touch that they can give a home without being complex, hoity toity or completely out of reach.  This stuff is easy, inexpensive and do-able. It doesn't matter what your design style is. There are ways to make things less complicated and incorporate them into your home.


1. Talk about clever. How about a cd rack turned bathroom organizer? I think this idea could be used in just about any room of the house including the bedroom for jewelry or perfumes, the pantry for spices, or the office for pens, pencils and what not.
2. I've talked about doing this with my sofa for ages. In fact, I think I've even shared this pin before. But hey, I'm not shy when I find a good idea. I don't have to keep it all to myself. Painters drop cloth as sofa cover? Hell yeah. Who the heck would care if the dog got on the drop cloth covered sofa??

3. How about using things you can find at any hardware store to change up some of your decor? Like rope for instance. Get the hot glue gun out and you  could transform any old plain jane mirror. 

(ps. check out the price of the one country living featured....I bet you could make this for under $20 bucks. just sayin')

4.  Ah, the wonders for decoupage. You can transform just about anything. If you don't dig the sheet music, choose something else.....stationery, wrapping paper, old newspapers, old book pages, scrapbooking paper.
The possibilities are endless.

5. This is as simple as a bouquet gets. Baby's breath and a glass with a little lace around it. So lovely.

6. Do you have old jewelry that you don't know what to do with? Been looking for a new memo board?  Here's the answer.  Glue magnets to the back of old bits of jewelry you have no use for anymore. You can also find plenty of inexpensive old jewelry at flea markets, thrift stores and antique shops. Use an old metal tray as your board and your new magnets to hold everything to it.  Pretty darn easy.

Have you pinned any easy, do-able design elements? If you have, share a link to your pin or board in the comments.

If you're not pinning with me on Pinterest yet, you'll find me here.  If you are on pinterest and like this post, you can easily pin it with the 'pin it' button just below this post.

Rainy day here. It had to happen sometime.  Make it a great one whether it's wet or dry.

See you on the flip side,


Wednesday, March 28, 2012

One Thing Leads To Another


Go Ahead, Click

Over in my sidebar you'll find Duni. She's a fellow etsy shop owner and fellow blogger.


Her blog, Duni's Studio is always full of lovely pictures, great craft projects and more.


This week Duni featured Mollie Makes Magazine, and wanted her followers to know that they also had a website where there were lots of tutorials and crafting how-to's.


I took the bait and she was right.  They even featured one of Duni's tutorials for a flower headband. Cute!

Then I found this paper flower post.


The tutorial led me here Crafted By Lindy, another blog by yet another fellow etsy shop owner. Talk about going in circles!  Oh yeah........circles.........check out this garland Lindy made.


Have you guessed what's it made out of? Yup. Cupcake liners. Fantastic idea-- what a cute way to dress up a party!

Don't you love the way that happens? That you go to one site, and it leads you to another? So cool.

Here's another one. Melinda is a follower of the Muse, and another etsy shop owner (who knew there were that many of us) who always post the sweetest comments (thanks Melinda!). 


Well, I stopped by her blog inspiration-earth the other day after reading one of her comments here.  I found this awesome tutorial Melinda did on natural wood stains.


Guess what Melinda used to get that wonderful aged look? Go ahead, guess. I'm not spilling the beans, you'll have find out for yourself right here. But don't you LOVE it? It looks like weathered barn wood. The tutorial is so simple, you'll be amazed.

While you're there, check out what she made with the wood blocks.........


How cute is that?

So many interesting, fun, crafty, artistic places to discover, so little time.

Enjoy your Wednesday. Mine is busy, busy and filled with design, ad planning, meetings and more. Hopefully I'll get a chance at the end of the day to take walk over in the field with Gar and the dog.


Related Posts Plugin for WordPress, Blogger...