Showing posts with label a sort of fairytale. Show all posts

Thursday, November 3, 2011

October. It's a wrap.


Already Into November

October seems to have gone by in a blur. In the blink of an eye. Quick as a bunny. No denying it, November is here.

Before I move on to the usual November celebrations (tomorrow is my birthday and my sister's is in two weeks, and then of course, Thanksgiving), I thought I'd pull some of my favorites from October.


A big thanks to Be Our Guest posters- Kristen from By The Book Paper, Daena from Bad Rabbit Vintage, and Stacey from A Sort of Fairytale.  I appreciate the time they took to put great tutorials together.

Other October mentionables include: great vintage finds, a cozy dog, campfires out back, some newly discovered local cheese, printable organization, jewelry making, great field walks with the hound, and one crazy Halloween snowstorm.

Thanks for sharing the beginning of Fall here at the Muse. Hope you'll stick around for more.

How Are You Going to Give?

Every year, I include something handmade in my gift-giving. 


It might be stationery that I've designed, holiday felt wall hangings that I made, memory boxes, or baked goods.  The list goes on.  Any shopping that I do for the holidays is done, for the most part, in local shops. I will continue to give in this way and expand it to include some wonderful things that I've found in fellow esty shops.  There's so many possibilities it will be hard to narrow the list down.  It's about more than just supporting fellow shop owners, it's changing the way in which we give. About getting back to the simple things that mean so much. It's about what has real value, as determined by each of us.  I think things that are lovingly designed and handmade in the small studios and workshops across the world, have more value than the common mass produced things most of us can easily access.  I believe something has more value, and often has a higher price (that I'm willing to pay), because more has gone into making it. The thought and care with which something is made, is an important part of the sentiment of giving that I am trying to share with those I love. 

What will your giving be focused on this year?

Sunset Meadows

It's been awhile, with all the rain and snow we've had of late.  However, last night Mom/Marge called to say I better get the camera out. I was still at my desk. Good thing she called or I may have missed it. 

It was quite lovely.


Very wispy and feathery.


I hope your Thursday is going wonderfully. Mine is going fine and dandy. Well, sort of. You know that new printer I got? Well it arrived and it's HUGE.Which means I can't set it up yet. Gar will be busy this weekend building me a new desk configuration to house the behemoth. Isn't he lucky?  Good thing is, if I need an extra coffee table when I have company, my new printer can do double duty.

See you on the flip side.


Tuesday, October 25, 2011

Be Our Guest: Stacey from A Sort Of Fairytale


Be Our Guest: Vintage Playing Card Tags

Hello Mercantile Muse Readers, I'm Stacey, from A Sort Of Fairytale and Maggie Jane's Vintage, and I'm so happy to be here Guest Posting today!  

I'm a I'm a Flea Market, Estate Sale, Thrift Store, Vintage Lovin' Wife and Mom. We just bought our first house and I am busy trying to make it the vintage style home of my dreams on budget (a word I wish was not in my vocabulary).  My Etsy shop, Maggie Jane's Vintage, is where I sell vintage and handmade decor, gifts, and supplies.  I also sell at local flea markets (am a total flea market junkie) and vintage markets/events.  I host an Etsy and Online Shop Link Party on my blog, every Thursday, so if you have a shop you would like to promote, come on over and join!  My full time job is Stay-At-Home Mom and my part time jobs are blogging at and selling vintage, and I can honestly say that all three jobs and my life itself are definitely a sort of fairytale!

Today, I have a little crafty tutorial for you!  Do you have any vintage playing cards that you think are pretty, but don't know what to do with?  I just love the images and illustrations on vintage playing cards, they're like little pieces of art!  They also make really good tags for gifts and pretty much anything you want to label.  Here's how to make your own:

Vintage Playing Card Tags


 Supplies:

Vintage playing cards - available on Etsy and in Thrift Shops
Scissors
Hole Punch
Ribbons, Lace - new or vintage
Scrapbook Paper
Paper Punch
Adhesive


Punch out paper shapes with your paper punch, I chose a 2.25" scallop
punch by EK Success.  These shapes will be the labels you attach to the cards.

(Note from Pam.......don't let not having a paper punch stop you, you can cut out whatever shape you like with scissors and use that!)


Use adhesive on the back of your paper punches to secure the punch to the playing cards.  I chose a tape runner adhesive, but you can use any type of adhesive you like (i.e. double sided tape, rubber cement, elmer's glue, hot glue gun, etc).


Affix the paper punch to the center back side of the playing cards.


Using your hole punch, punch a hole at the top center of the card,
I just eyeballed it, but you can measure if you like.  


Cut various styles of laces and ribbons into blank 13 inch lengths, or 
to another length you would like it to be.


Fold ribbon or lace in half and feed through the hole punch and bring
the ends back through the loop, then gently pull tight,


so it looks like this...


Back view of finished tag.


That's it, you're done!


I was also thinking you could add buttons, cabochons, etc. to embellish 
the tags and make them extra fancy.


This is a super easy craft that is full of vintage cuteness, and is a nice way to recycle/upcycle vintage items.  With the holidays coming up, this would be a fun way to embellish all of your packages!

Thank you, Pam, for letting me guest post on your lovely blog today!

Pam: No, thank you Stacey............Love that tutorial and certainly something anyone could tackle. Thanks so much for the time you took in preparing and sharing your vintage playing card tutorial on Mercantile Muse!  I am definitely pinning this great tutorial on pinterest!  (Remember,if you are a pinterest finatic, you can easily pin anything on the Muse via the pinterest link at the bottom of any post).

I encourage you all to stop by Stacey's wonderful shop to see all the goodies she's got in store!

2nd 'Gotta Have It Link' Party & Prints Coming Soon

First, I'd like to say that I was overwhelmed with the response to our link party.  Since so many shop owners stopped by and linked up, I want to give you all a heads up that tomorrow is the start of our second  'Gotta Have It' Shop Link Up Party. Be sure to stop by and add your shop to the party and spread the word!  If you don't have an online shop, no worries. Stop by anyway and do a little window shopping. Browse through the shops that have linked up. I promise, you won't be disappointed-- there is sure to be a wonderful variety of things.  It's just plain fun to look around.

On another note, we are currently waiting on a new printer that will allow us to offer museum/gallery quality archival prints of my illustrations at Bates Mercantile Co. I'm very excited about the new printer given previous feedback from many of you, and our customers, about wanting prints as an option. The printables that we offer just aren't for everyone as they can be a little intimidating for those who are a little less tech-savvy.  We are REALLY excited to be able to offer high-quality, archival glicee prints........just as soon as the new Epson R3000 printer arrives.  Anyone have any paper suggestions? Input always welcome.

Wishing you all a super Tuesday. I've got a long list to take care of including the dreaded bookwork (is there anyone out there who likes it?), as well as putting new items in the shop and printing off and preparing new note card sets to go into the shop. Add that to my 3D business list and my head is spinning!  Feel free to stop by Bates Mercantile Co. later in the day to see what I've accomplished.  What's on your list?

It's a little brisk here today. If you were worried about the dog being cold, don't be. He's staying all warm and cozy, curled up on the couch with his blankie.  It is a dog's life afterall.


Monday, October 24, 2011

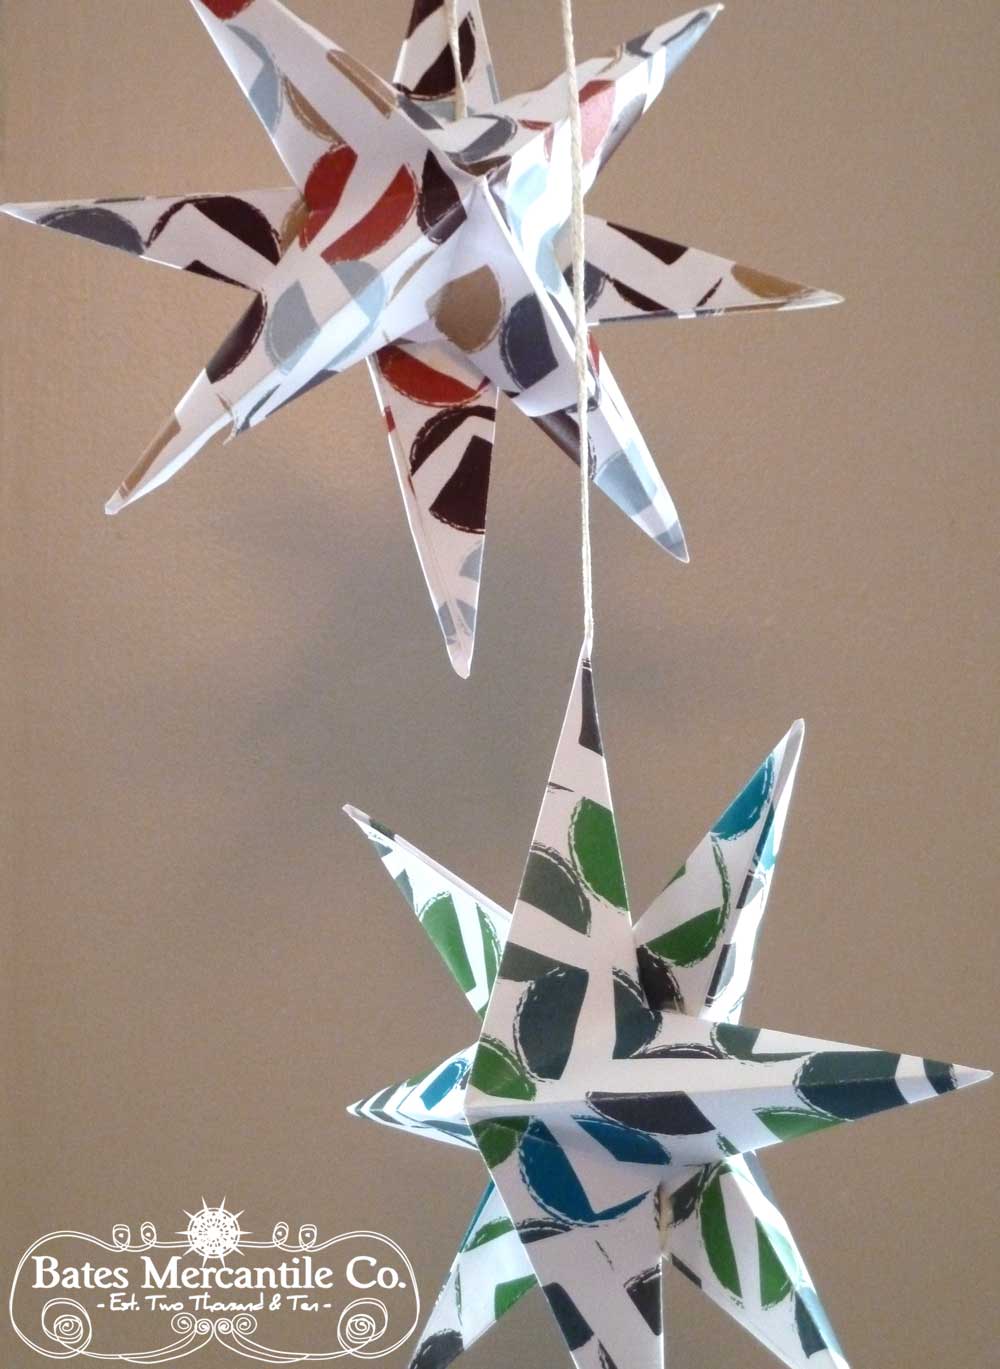
Be A Star, or For That Matter.......Make One


Star Shine

I have to thank Cari-Jane from HyrbridHandmade for pinning an awesome paper star tutorial on pinterest. I love it and it looked so do-able, I tried it right away.  Here's my own take on the tutorial that Cari-Jane pinned. 

You'll need:

two pieces of square paper- you could use origami paper
(I used a 32 lb. printer paper)
scissors
glue
ruler
string, ribbon or twine

I printed off one of my illustration designs to use for my paper.


Then I trimmed it to 6 x 6 like the original tutorial, but you could use any square size.


Fold your paper in half.


Then fold in half the other way, so you now have folds on your paper like this.


Next step is to fold corner to corner.


Again, now fold from other corner to corner so you fold lines now look like this.


On lines coming from sides (not corners), make a just shy of halfway. On my 6 x 6 square, I marked at 1.25. 


Continue until each side is marked, like this.


Cut along line to each mark.


Once lines are cut, fold over to line coming from corner. 


Do this all the way around until your paper looks like this.


Now glue one flap at each 'star' point, and pull other flap over and hold until glue is set.


Choose one point to insert twine in before completing all sides.


Complete rest of points.


You now should have a 3 dimesional star that looks like this on one side.........


........and this on the other.


Repeat this process, except for the twine, to make another star. Once you have two stars you are going to glue together. Place glue like this.


Gently press two stars together and hold in place until glue sets.


Wait 10 minutes before hanging to be sure glue is set enough.


Decorate with your new star as you see fit. 

Hang a lone star or...................


.......hang in a grouping. 


I think this is the perfect craft with the holidays coming up. I've adjusted my Chinese Lantern pattern an 8x8 size so most people can easily print it out on 8.5 x 11 paper to use for this project.  I would have tried the 8x8, but was trying to follow original tutorial.  I did use a little bit heaver 32 lb. paper, but you could certainly try it with regular copy pape. I think by the time the stars are folded and glued, it would have enough stability. 

Click below and right click to save to your computer or copy and paste into a document.


I would have tried the 8x8 paper design, but was doing my best to follow original tutorial to a T.  FYI- I did use a little bit heavier 32 lb. printer paper, but you could certainly try it with regular printer paper. I think by the time the stars are folded and glued, it would have enough stability.

What are you waiting for? Give it a try!

This week you get two back-to-back tutorials because tomorrow finds Stacey  from A Sort Of Fairytale and Maggie Jane's Vintage taking on the Muse's Be Our Guest post and wait until you see the card-tags she's going to show us how to make.  They're a ton of fun! 

Here's wishing you a wonderful Monday. Start your week off with a bang.


Related Posts Plugin for WordPress, Blogger...